
-
Yuri Dial Micron Indicators
Regular price Rs. 0.00Regular priceUnit price per -
Yuri Dial Indicators
Regular price Rs. 0.00Regular priceUnit price per
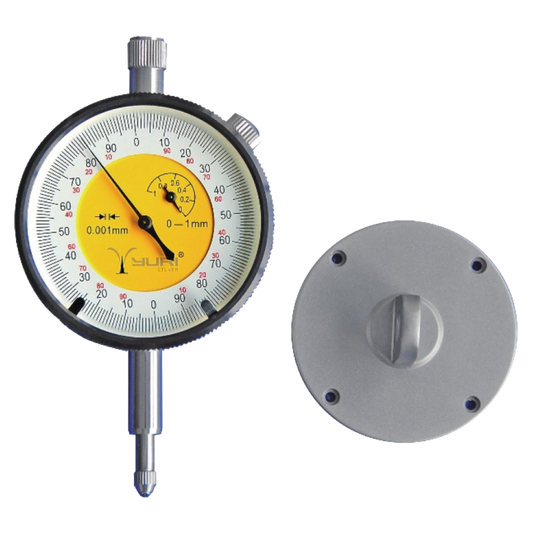
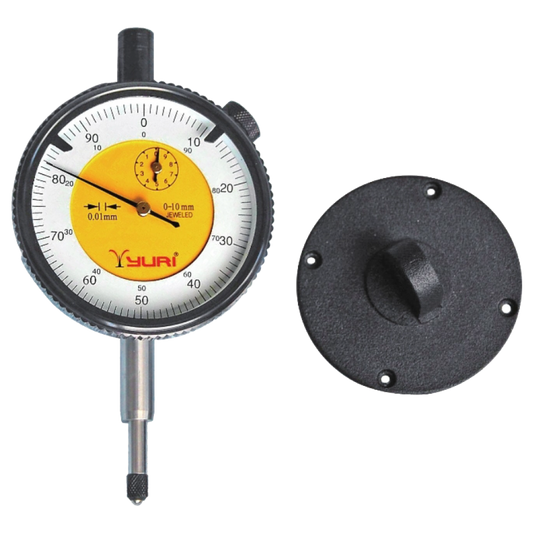
Indicators for Accurate Checking, Alignment, and Measurement Work
Indicators are small measuring tools, but on a workshop floor they can save a lot of time and prevent costly mistakes. When a mechanic, machinist, fabricator, or quality checking team needs to check runout, alignment, surface variation, or small movement in a part, an indicator gives a clear reading instead of leaving the work to guesswork. That is why indicators are commonly used in machine shops, tool rooms, fabrication units, maintenance departments, and inspection areas.
Yuri indicators are made for users who need clean readings, steady movement, and dependable checking support during daily work. Whether the job is setting up a machine, checking a rotating part, inspecting a finished component, or aligning a workpiece before machining, a good indicator helps the user see small errors before they become bigger problems.
Why Indicators Are Useful in Workshop and Inspection Work
In many jobs, a small difference can affect the final result. A shaft may look straight by eye, but still have runout. A machine table may seem level, but a slight movement can affect cutting accuracy. A part may appear properly fitted, but a small misalignment can create vibration, wear, or poor finish. Indicators help users catch these small changes early.
This is especially useful in Indian workshops where one machine may be used for different jobs throughout the day. Before starting important work, operators often need to check alignment, tool position, and part movement quickly. An indicator makes that checking process easier and more repeatable. It gives the user a simple reading that can be adjusted and verified before the actual work begins.
- Checking shaft runout and rotation movement
- Aligning jobs on lathes, milling machines, and fixtures
- Checking surface flatness and height variation
- Supporting quality checks after machining or finishing
- Helping maintenance teams inspect machine movement
- Reducing trial-and-error during setup work
Why Choose Yuri Indicators
A measuring tool should feel reliable in the hand. If the needle movement is uneven, the reading is hard to understand, or the body feels weak, the user loses confidence in the result. Yuri indicators are selected for practical workshop use, where tools are handled often and readings need to be clear.
The purpose is simple: help users check small movement with better control. For a fitter, this may mean aligning a job before machining. For a quality inspector, it may mean checking a finished part before dispatch. For a maintenance team, it may mean identifying vibration or movement in a machine component. A good indicator becomes part of the daily checking habit, especially where accuracy matters but the work has to move quickly.
- Clear reading support for inspection work
- Useful for setup, alignment, and machine checking
- Practical for workshop and tool room environments
- Helps improve consistency in repeated checking tasks
- Suitable for professional and industrial users
Where Indicators Are Commonly Used
Indicators are often found near machines, inspection tables, and tool cabinets because they are used across different types of work. In machining, they help set up jobs correctly before cutting begins. In fabrication and repair work, they help check movement and alignment. In quality control, they help confirm whether a part is within the required limit.
They are also useful around machines that work with cutting and rotating parts. For example, when a workshop is checking saw chain setup, a chainsaw guide bar, or a chain saw guide bar used in outdoor cutting equipment, related accessories such as guide bars may also be part of the same tool and maintenance environment. This makes indicators helpful not only for production work, but also for regular tool checking and machine care.
- Machine shops and tool rooms
- Automotive repair and service units
- Fabrication and metalworking shops
- Industrial maintenance teams
- Quality inspection departments
- Training workshops and technical institutes
How to Choose the Right Indicator
Choosing an indicator depends on the type of checking you do most often. For general workshop use, a standard indicator can handle many alignment and runout checking jobs. For finer inspection work, the user may need better sensitivity and a clean dial reading. The range, graduation, stem size, mounting style, and reading visibility should all be checked before buying.
It also helps to think about how the indicator will be used. A tool room may need an indicator for regular checking on a surface plate. A machine operator may need one for job setup on a lathe or milling machine. A maintenance worker may need it for checking movement in rotating parts. If your work involves close measurement and part inspection, pairing indicators with micrometers can give a stronger setup for both dimensional checks and movement checks. Some users may also keep a digital micrometer or measuring micrometer nearby when the job needs closer size verification.
- Check the measuring range required for your work
- Choose a clear dial or display that is easy to read
- Look for smooth pointer movement and stable return
- Select the right mounting option for machine or bench use
- Keep the work environment in mind, especially dust and vibration
- Use the tool carefully to protect the measuring tip and mechanism
Indicator Use in Real Working Conditions
In a busy workshop, tools are not used in perfect laboratory conditions. There may be dust, oil, vibration, heat, and constant movement around the work area. That is why handling matters. An indicator should be placed carefully, adjusted slowly, and checked from the right viewing angle. Even a good tool can give a poor result if the setup is loose or the contact point is not placed correctly.
Many operators use indicators during machine setup because it helps them avoid rework. A few minutes spent checking alignment can save much more time later. For example, before machining a round job, checking runout can prevent uneven cutting. Before fitting a component, checking movement can avoid vibration problems. Before sending out a part, checking variation can help maintain quality.
Using Indicators with Other Workshop Tools
Indicators are not usually bought as a one-time tool for one narrow job. They are part of a wider workshop measuring and maintenance setup. A user may have cutting tools, drilling tools, measuring instruments, holding tools, and finishing tools, all used together depending on the work. In mobile repair or installation jobs, teams may also carry cordless power tools along with checking tools so they can inspect, adjust, drill, fasten, and finish the job without depending too much on a fixed power point.
This is where a practical tool collection makes sense. Indicators help confirm accuracy. Drilling and cutting tools help complete the work. Measuring tools help verify sizes. Cordless tools help the team move freely across different work areas. The best cordless tools are not chosen only for speed, but for how well they support real job-site movement, battery backup, and control. When these tools are selected properly, the workflow becomes smoother and the team can work with better confidence.
Quick Selection Guide
| User Need | Indicator Use | Helpful Buying Point |
|---|---|---|
| Machine setup | Checking job alignment before machining | Choose clear readings and stable mounting |
| Quality inspection | Checking movement, variation, or runout | Look for smooth movement and repeatable readings |
| Maintenance work | Checking vibration, shaft movement, or worn parts | Choose a durable body and practical range |
| Tool room use | Regular measurement and checking support | Keep compatibility with stands and holders in mind |
Care and Handling Tips
Indicators need careful handling because they are precision tools. They should not be dropped, forced, or stored loosely with heavy tools. After use, wipe the contact point and body clean. Keep the tool away from heavy dust, moisture, and direct impact. If the needle does not return smoothly or the reading feels inconsistent, the tool should be checked before using it for important inspection work.
- Do not press the measuring tip harder than required
- Store the indicator in a safe box or protected tool cabinet
- Keep the dial or display clean and easy to read
- Avoid using the tool near heavy vibration unless properly mounted
- Check zero position before starting measurement
- Handle it as a measuring tool, not as a general workshop accessory
FAQs
What are indicators used for?
Indicators are used to check small movement, runout, alignment, surface variation, and setup accuracy in machining, maintenance, and inspection work.
Are indicators useful for machine shops?
Yes, indicators are very useful in machine shops because they help operators align jobs, check movement, and improve setup accuracy before machining.
Can indicators be used for quality inspection?
Yes, they are commonly used for inspection tasks where small changes in movement or surface variation need to be checked clearly.
How should I store an indicator?
Store it in a clean, dry, and protected place. Avoid keeping it loose with heavy tools because impact can affect the reading mechanism.
Do indicators work with other measuring tools?
Yes, indicators are often used alongside micrometers, measuring instruments, and other inspection tools to create a more complete checking setup.
Explore Yuri Indicators
Yuri indicators are made for users who need practical measuring support in workshops, machine shops, inspection areas, and maintenance work. They help users check alignment, movement, and surface variation with better confidence. Whether you are setting up a job, inspecting a part, or checking machine movement, indicators make the process more controlled and easier to repeat.
For professionals who want a more complete measuring and workshop setup, Yuri offers tools and accessories that support cutting, drilling, checking, finishing, and maintenance work across different industrial and site-level applications.